Customer Management
Manage, personalise and improve customer relationships
Introduction
Customer management system that allows users to personalize the customer experience by creating and managing customer categories, configuring pricing structures using price books, setting custom sales terms and personalised units of measurement, providing a 360-degree view of the customer, enabling collaborative sales efforts and tracking customer interactions.
It also provides valuable reporting and analytics capabilities to gain insights into customer preferences and buying habits, and make data-driven decisions to improve sales and customer satisfaction.
Features

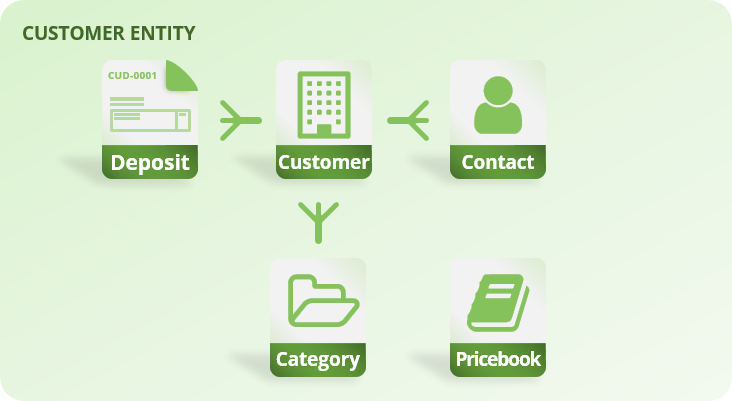
Customer Category
The CRM function allows users to create custom categories to group customers based on shared characteristics, such as industry or purchase history.
This feature enables users to streamline reporting and analysis by providing a level of aggregation, helping them understand customer behavior at a more granular level.

Pricebook
The system allows users to create custom pricing structures called price books, which can be tailored to specific groups of customers.
This feature gives users the flexibility to offer discounted prices or promotions to selected customers, allowing them to incentivize sales and build stronger relationships with key clients.
Customer Deposit
The CRM function also provides functionality for collecting customer deposits before invoices are issued, which can be used as a form of payment for invoices or returned when the invoice is paid.
This feature enables businesses to ensure customer commitment, and makes sure they have enough money to pay for the invoice and it also gives businesses a cushion of funds to fall back on if needed.
Highlights
Seamless pricebook integration
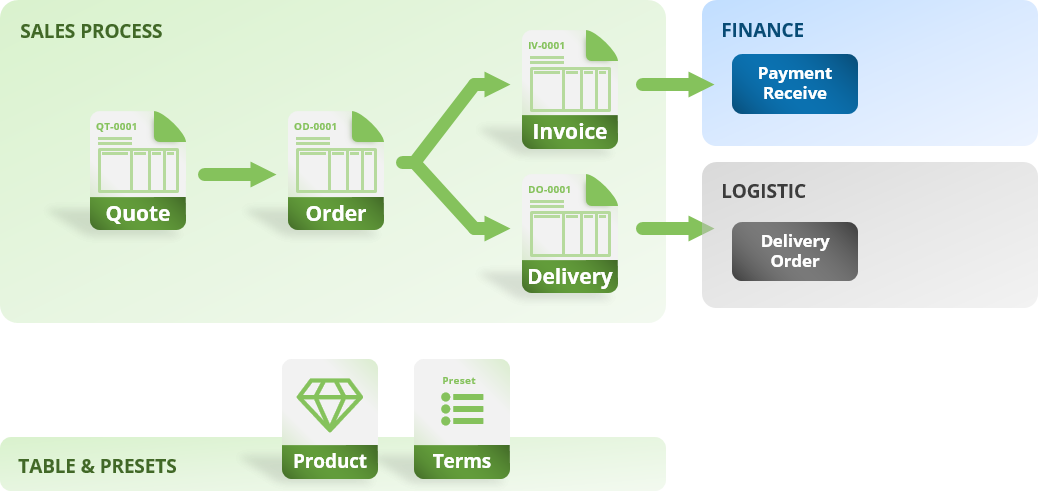
The price book feature is integrated with key sales documents, making it easy to manage prices. With this feature, any pricing structures or discounts set in the price book are automatically reflected in the line items of quotes, orders and invoices. This streamlines the workflow and eliminates the need for manual updates.
In addition, this feature allows for flexibility when it comes to showing discounts to customers. The discounts can be shown as either a discount or a markdown on the selling price. This gives users more control over how they present pricing to their customers, making it simple to showcase the value of their products or services.
Processes
Receiving Advanced Deposits

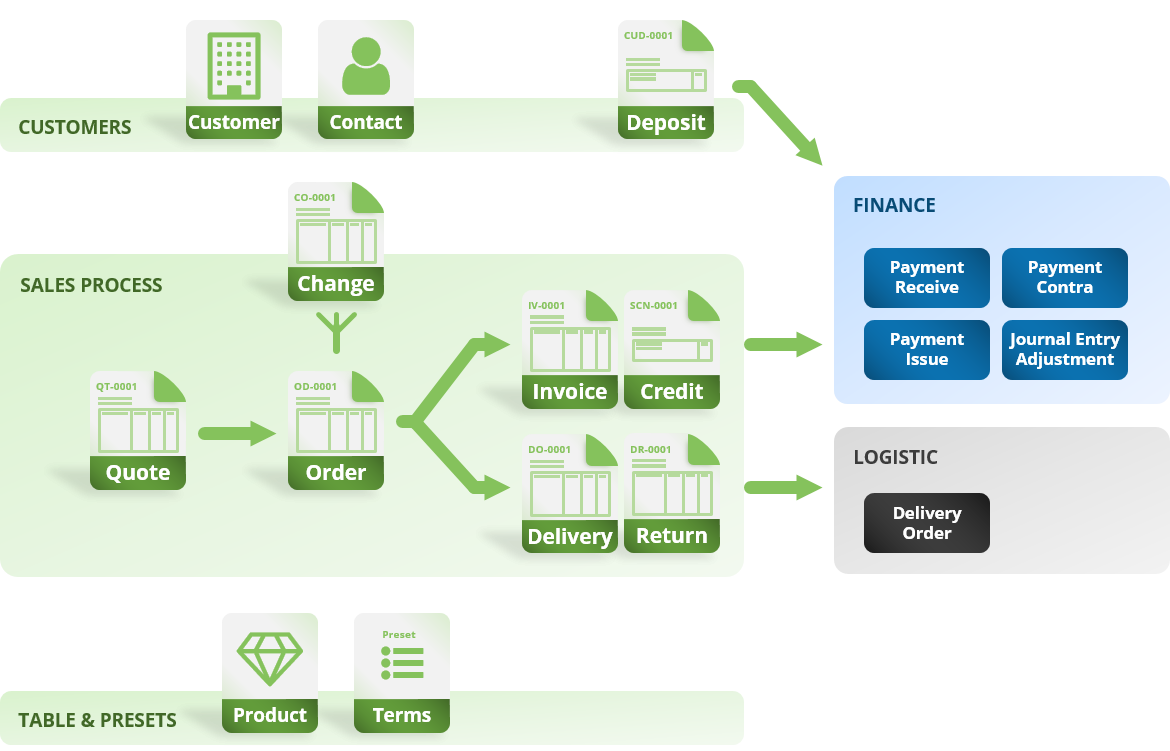
Receiving customer deposits can be a straightforward process if the proper steps are followed. The first step is to create a deposit request in the finance module. This deposit request should include customer information, the purpose of the deposit, and banking instructions for the customer to follow.
Once the deposit request has been created, it can be sent to the customer for them to proceed with making the payment.
When the payment is received, it should be verified by a member of the finance team. After verification, the deposit can be marked as paid in the system, which will post the transaction to a deposit ledger. This deposit ledger can be used to track and report on customer deposits.
The deposit can then be used as a credit against future invoices or refunded to the customer via the advance payment processor.
Applying Deposits
The process of applying customer deposits to invoices is a simple, straightforward process that does not require any action from the customer. The process starts by creating a new payment receive document, in which the user can select the customer and the invoice that the deposit will be applied to.
In the payment source section, the user can select the deposit entry that they want to use to pay off the invoice. They can also stack multiple deposits or mix multiple payment sources to make the payment. This gives the user flexibility and control over how they want to apply the deposit to the invoice.
Once the deposit has been selected, the user can mark the payment as paid, indicating that the invoice has been successfully paid off. The system also automatically updates the deposit ledger, as well as the customer’s account to reflect the payment.
Refunding Deposits
Refunding payments to customers can be done quickly and easily using the advance payment processor, which can be done in a single document.
To begin, create a new payment issue and select the customer for whom the refund is being issued. Next, select the deposit document that the refund will be based on. Once the customer and deposit document have been selected, the next step is to choose the outbound payment source account. This is the account from which the refund will be issued.
After the payment source account has been selected, perform the transaction. And finally, the payment issue should be marked as paid in the system to indicate that the refund process is complete.
Processes
Tours
- Bookkeeping & Automation
- Tips to do thing and that
Tutorials
- Bookkeeping & Automation
- Tips to do thing and that
